Controlling Exposure
The first step to becoming a better photographer can also be the scariest, so grab your camera, find a comfortable chair, close your eyes, take a few deep breaths, and clear your mind. Now, open your eyes and without hesitation, take your camera out of Automatic mode and rotate that dial all the way to Manual mode. You are now in full control of your exposure. Everything after this is easy by comparison, but I hope you're ready for a little math. Don't worry, though; it's not calculus. It's more relationships than real math, and it's conceptual enough that you won't have to break out a calculator. There are three factors that determine your exposure: ISO, Shutter Speed, and Aperture. This section will give you a full understanding of the impacts of each of them.
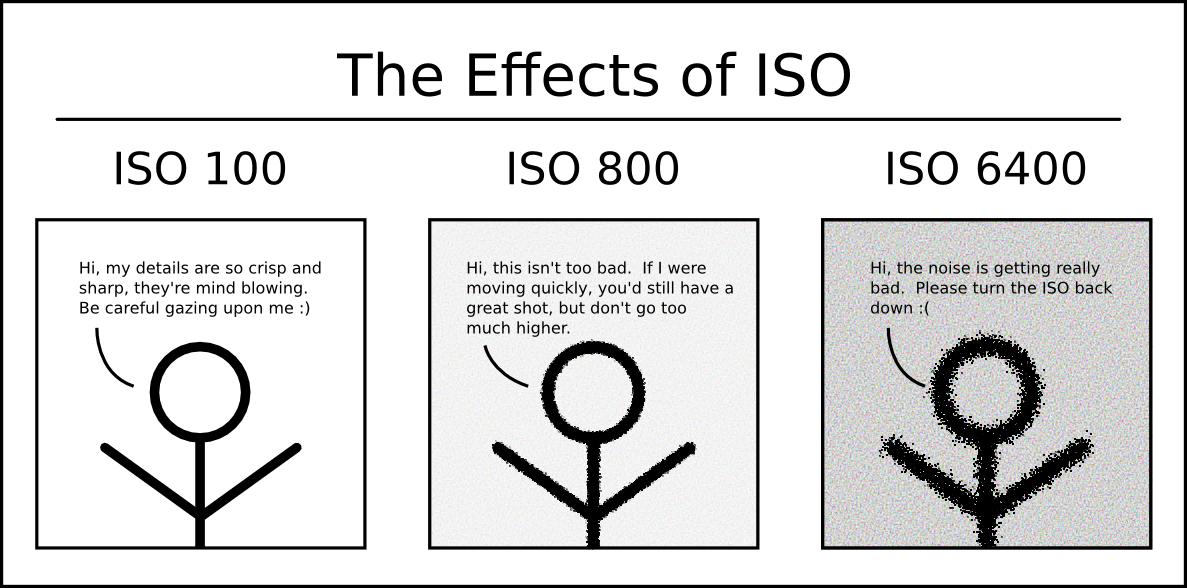
There's no real order to them, so I'll start with ISO. ISO is sometimes considered unimportant these days, and I will admit that it may seem as though it was more important in the film days, but it's just as important now as it was then. In the old days, ISO referred to the speed of the film, i.e. how long it took to properly expose the film. Slow film took longer to expose than fast film. For example, ISO 25 film might take 1 second to reach proper exposure, while ISO 800 film would only take 1/32 seconds. The problem in the film days was that the entire roll of film had the same ISO, so if the lighting conditions were changing rapidly, you were out of luck. Today, we can change the ISO sensitivity of the camera's sensor with each shot. It still tells the sensor how sensitive to light it should be and thereby controls how long the exposure will take. The difference between film and digital here is instead of film grain, which many considered to be visually pleasing, we get digital noise, which many consider to be garish. The higher the ISO you use, the more noise you get. Additionally, with higher ISO, you get reduced color depth. It takes time to resolve the full detail and color present in a scene. In broad daylight, there's so much light that you can use the lowest ISO your camera has and still end up with exposure times that are tiny fractions of a second, but in a dimly lit room, it may take several seconds to get a proper exposure, even at a higher ISO. With ISO, you control how quickly you can achieve proper exposure, but using higher ISOs comes at a price. When you can, aim to use the lowest ISO possible.
This is so important, I'm going to say it again. Lower is better. Always. High ISO increases noise and decreases color depth. Unless you like shooting grainy flat images, bottom out your ISO and keep it there. My favorite ISO is 50 and that's only because my camera doesn't have anything lower.
If I could shoot every image at ISO 50, I would. But, of course, there are perfectly sound reasons for increasing it. When capturing the Milky Way at 14mm and f/2.8 (the fastest my ultra-wide-angle lens can be set to), to get a proper exposure at 30 seconds, the ISO must be bumped to 3200, otherwise the image will be hopelessly dark. If I were to decrease the ISO and increase the exposure time to maintain proper brightness, the stars would begin to streak and the image would be lost.
For a perhaps more common example of when high ISO is appropriate, consider shooting a moving subject in low light outside the range of a flash, be it an indoor sporting event or wildlife at dusk. In order to freeze the motion of your subject, you're going to need a fast shutter speed. The lack of light is then going to mandate a higher ISO.
The lesson here is not to blindly set your ISO as low as it will go and forever keep it there, but rather to always keep it as low as you can to capture the image. Subjects suffering from motion blur are no more acceptable than subjects obscured by excessive grain. ISO is thus a subject of balance. A balance which should be tilted in the lower direction to maintain quality but set sufficiently high to capture your subject.
Shutter speed is the amount of time the sensor spends collecting light to form your image. Under normal conditions, typical shutter speeds are measured as fractions of a second. For example, 1/30 means your exposure was 1/30th of a second. If you think of film, which is 24 frames per second, that means each exposure in the film is 1/24th of a second. If it's a bright day outside, it's perfectly normal for shutter speeds to be measured in hundredths or thousandths of a second. The more light there is in a scene, the less time the shutter needs to be open to let enough light collect in the sensor to get a proper exposure. Conversely, the less light there is in a scene, the longer the shutter needs to remain open to let enough light collect in the sensor to get a proper exposure. For example, at night, it's perfectly normal for exposure times to be 30 seconds long, or even into the minutes. The longest single exposure I've taken was 8 minutes. On most cameras, without a special remote shutter release, shutter speeds will vary from 1/8000 of a second to 30 seconds. To achieve longer exposure times, you need to use "Bulb Mode," but I'll get into special conditions and longer shutter speeds later. For now, just remember that faster shutter speeds mean less light while longer shutter speeds mean more light.
Aperture is the size of the opening in the lens through which light travels to get to your sensor. It is also generally the largest source of headaches for novice photographers experimenting with Manual Mode for the first time. It's measured in f-stops, for example f/2.8. What's confusing about it is, it's an inverse relationship. As the number gets smaller, the size of the opening gets larger, thus increasing the amount of light reaching your sensor. Similarly, as the number gets larger, the size of the opening gets smaller, thus decreasing the amount of light reaching your sensor. For example, f/2.8 lets in more light than f/8. Smaller apertures also decrease your depth of field, but we'll get into that later in the Depth of Field section. The other source of headaches is that more experienced photographers will refer to "larger" or "smaller" apertures, not in relation to the exact number, but to the size of the opening, so a smaller aperture would be f/16, while a larger aperture would be f/1.4. If you dial the aperture all the way down to the smallest number your lens has, then you'd say it was "wide open," that is, you've opened the aperture as wide as it will go, allowing as much light to get to the sensor as that lens is capable of. More expensive lenses will have larger maximum apertures. There is yet another source of headaches related to aperture, but I'll get into that in the next section. For now, simply remember that larger apertures (smaller number) mean more light, while smaller apertures (larger number) mean less light.
If your head is spinning a bit from the last three sections, that's perfectly normal. ISO, Shutter Speed, and Aperture are complicated concepts to grasp on the first pass, and you won't truly get a handle on them until you go out shooting and dial each one up and down to really see what they do. Until then, here's a handy summary table to get you through this section:
| Smaller Number | Larger Number | |
| ISO | Less Light | More Light |
| Shutter Speed | Less Light | More Light |
| Aperture | More Light | Less Light |
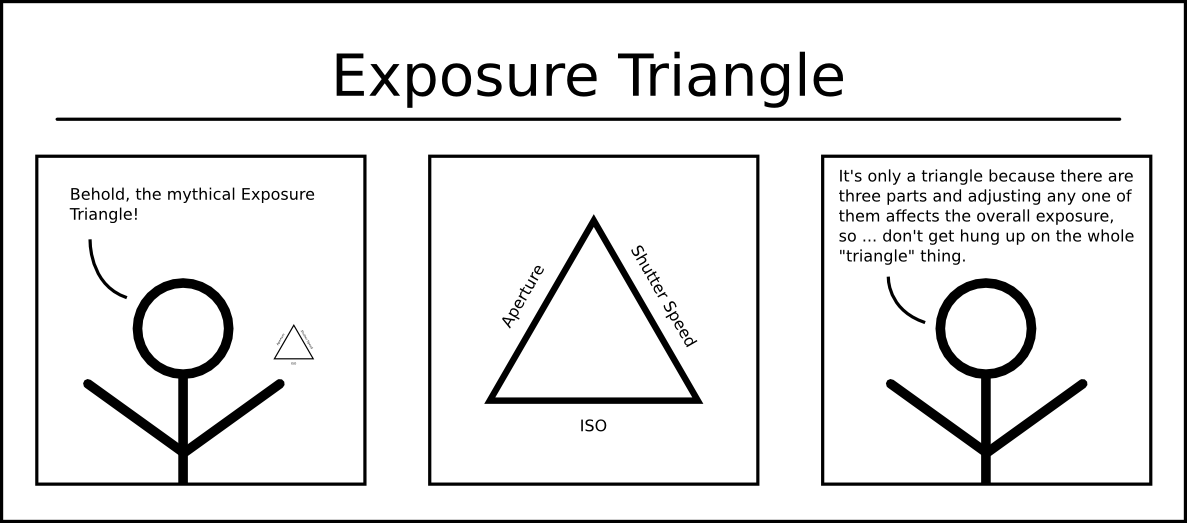
ISO, Shutter Speed, and Aperture collectively form the Exposure Triangle. This is because they are the three settings on your camera that you can use to adjust how much light reaches the sensor. External to your camera, you can add a flash or, if you have a weather machine, you can move the clouds out of the way to let more sunlight in, but internal to your camera, ISO, Shutter Speed, and Aperture are it. And, since they all affect exposure, they are all connected. At this point, you need to start thinking of how you need to set each of them to achieve the desired image. But, I can hear you asking, "If they all affect exposure, does it matter which one I adjust to get a good exposure," and I'm so glad you asked. Yes, it absolutely does matter which you adjust to get a good exposure. If it didn't matter, you could put your camera back into Automatic Mode and it'd produce Ansel Adams quality shots every time. The best way to get a handle on how they're related is to work through some examples.
WARNING: The following few paragraphs are going to sound a lot like math problems. That's because to achieve a proper exposure in the field, you're going to have to have a solid understanding of the relationship between ISO, Shutter Speed, and Aperture. And that relationship is a mathematical one. So if you need a stiff drink after finishing this section, I won't hold it against you. But, don't worry too much. I'm going to try and make it as intuitive as possible so you can figure it all out without having to actually do any math :)
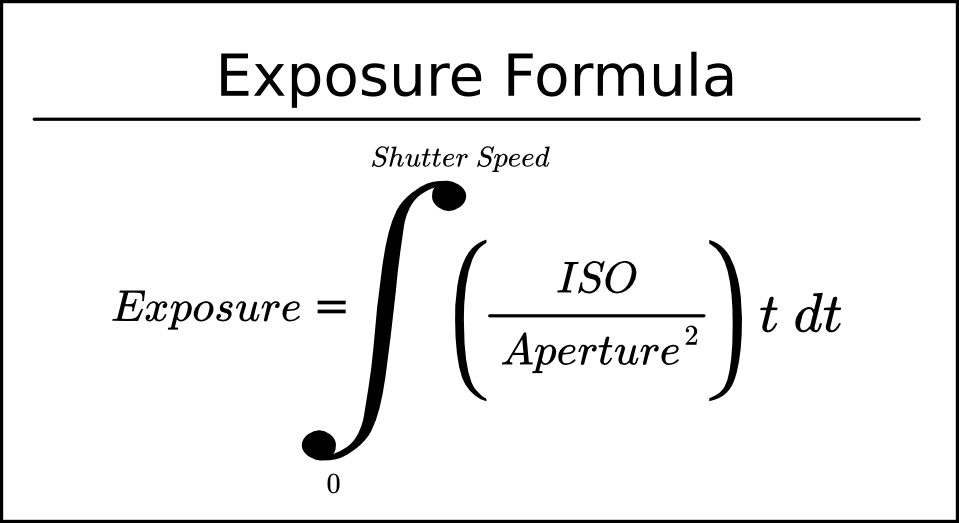
For those familiar with integral calculus, the above (completely made up) equation should actually tell you everything you need to know. For those less familiar with integral calculus and more disinclined towards math jokes, please continue on to the next paragraph.
Lets say you're shooting a sporting event indoors. The first thing that should occur to you is that you'll need a fast shutter speed to freeze the athletes in place, otherwise, you'll get motion blur because in the duration that your shutter was open, they moved fast enough to cause streaking. Ok, so you know you need a fast shutter speed, but what about aperture? You remember that a wider aperture means more light and you're indoors, so the more light the better, so you dial in the widest aperture your lens has. Now, you've got a fast shutter speed dialed in and your aperture as wide as it'll go, you take your first shot, and it's super dark. It's so dark, you can barely see anything. You could reduce your shutter speed to let more light in, but you know that if you reduce it too far, you'll get motion blur. This is where ISO comes in. You crank up the ISO a few notches and voila, a good exposure. In this case, it was worth using a higher ISO and risking the grain from noise to keep a faster shutter speed to prevent motion blur.
Now, let's say you're out the next day shooting the wildlife at a local state park. You snap your first picture, and it's completely white! What's going on? You remember that to get good exposures yesterday while indoors, you had to turn your ISO way up and had your aperture wide open. The settings that allowed you to gather enough light to get good exposures indoors are now allowing too much light to reach your sensor and the entire image is blown out. You dial the ISO all the way down and take another picture, but because the sun is so bright, the image is still over exposed. At this point, you have a choice. Do you increase shutter speed or decrease your aperture? You heard from a buddy who shoots a lot of wildlife that he always shoots wide open, so you keep aperture the same. It's not the most sound of reasoning, but it makes the decision easy. You increase your shutter speed a few clicks and voila, a good exposure. Here, you had to decrease your ISO and increase your shutter speed to prevent too much light from over exposing your image.
At the end of the day, you decide to go down to the dock and shoot the sunset. The clouds are turning a marvelous shade of deep pink. You take what you expect to be an excellent shot of the sun going down over the water, but the sun is completely blown out and so are most of the clouds. You think back to earlier in the day when you reduced the amount of light in your exposure by increasing your shutter speed and click the wheel a few times, only to discover that you'd been shooting at your camera's maximum shutter speed. You had already bottomed out your ISO earlier and aren't sure what to do next. That's when you remember the other part of the Exposure Triangle: Aperture. You dial in a smaller aperture and voila, a good exposure. This time, you'd already reached the extreme's of your camera's ISO and Shutter Speed and had to reduce your aperture to get a good exposure. Remember: reducing your aperture means you dialed in a larger number.
On your way back to the car, you see some neon signs that would make a cool picture. You pull out your camera, but this time, before taking a picture, you think for a moment. The last settings you used were to capture the full light of the sun. It's now dark, so that means a whole lot less light. You think back to when you were shooting sports indoors and it had been kind of dark. There, you had used your lens' maximum aperture and a higher ISO setting to get a good exposure. Hoping that this would work again, you dial in the maximum aperture, a higher ISO, and slow down the shutter speed back to a sane number from the blisteringly fast 1/8000 it had been on the for the sunset. Now, you take your first picture. It's a little dark, but much closer to a good exposure than it would have been if you had used your previous settings. You bump your ISO up another notch, and voila, a good exposure. Your confidence has skyrocketed. From all of your experience in vastly different lighting conditions over the past two days, you've really started to understand how to manipulate the Exposure Triangle to get a good exposure.
For those of you who are jumping up and down and yelling at me for the last example, yes, I know. You're right. Calm down. Increasing the ISO to get a good exposure of a static subject was the wrong choice. For those of you who are lost as to why that was the wrong choice, go back and reread the above section on ISO. I'll explain why in far more detail in a later section. For now, revel in the fact that you got a good exposure at night, lighting conditions that would have resulted in more than just a little motion blur for the less experienced. For more indepth discussion on taking pictures at night, skip ahead to the Nighttime Long Exposure section.