Long Exposure
Long exposure is beautiful. It slows down time and shows people something they can't see with the naked eye. It transports them to a mystical world where everything is fanciful and beyond real.
Sections
Taking good pictures at night can be a daunting task until you realize how obvious the answer is. For starters, most people don't even realize that it's possible to take good pictures at night. Don't snicker. You don't want to know how many people I've amazed with this fact. The problem with taking pictures at night is that under most nighttime conditions, your light meter is useless. What that means is that it's too dark for your camera to be able to tell you what settings you need to get a good exposure. So, if you try to take a picture at night in Automatic Mode, you'll usually get a few bright points of light and everything else will be black. I've found that a good exposure at night is 3-5 stops above what my camera's light meter thinks it should be. But that number varies from scene to scene and only serves as a general starting point. Since most nighttime shots will take 30 seconds or longer to take, it can become very tiring to wait for each test shot to finish exposing just to check focus and/or framing. To solve that I use high ISO test shots.
With your camera in Full Manual mode, set your ISO to 6400 or higher if it's really dark. Set your shutter speed to 1 second. And set your aperture as desired. Usually for nighttime shots, your aperture will be a little wider than it would be for a daytime shot of the same subject. For example, if you'd usually shoot a scene at f/8 during the day, try using f/5.6 for your nighttime shot. ISO 6400+ and shutter speed of 1 second is the easiest place to start from math-wise, and 1 second is fast enough that it won't turn into a battle of patience waiting for test shots to cook. Once you've framed the image, take your first test shot. Check your focus and framing and adjust them as needed. Then evaluate your exposure. Adjust your ISO to get the scene how you like. When in doubt, try adding a stop or two just to see what it looks like. Check for blown highlights though. At night, if there are lights in your scene, they will be blown highlights, so your job is to decide how much is acceptable to properly light the rest of the scene. Repeat as necessary until you're happy with framing, focus, and exposure. Now it is, rather unfortunately, time for some math. What we need to do is drop the ISO from the high ISO setting used in the test shot to the final low ISO needed to get a good clean shot. Assuming you've configured your camera as directed in Part I's section ISO Adjustments, every click of the ISO wheel is one stop of light lost, for which you'll compensate by doubling your shutter speed for each stop. For example, lets say your high ISO test shot was taken at ISO 1600 and you want to take the final image at ISO 100. That's a loss of four stops of light (1600 -> 800 -> 400 -> 200 -> 100). With every wheel click, double the shutter speed (1 -> 2 -> 4 -> 8 -> 15). With your ISO at 100, set your shutter speed to 15 seconds and take the picture. It should be identical to your test shot in every way, minus all of the noise and detail loss from the high ISO.
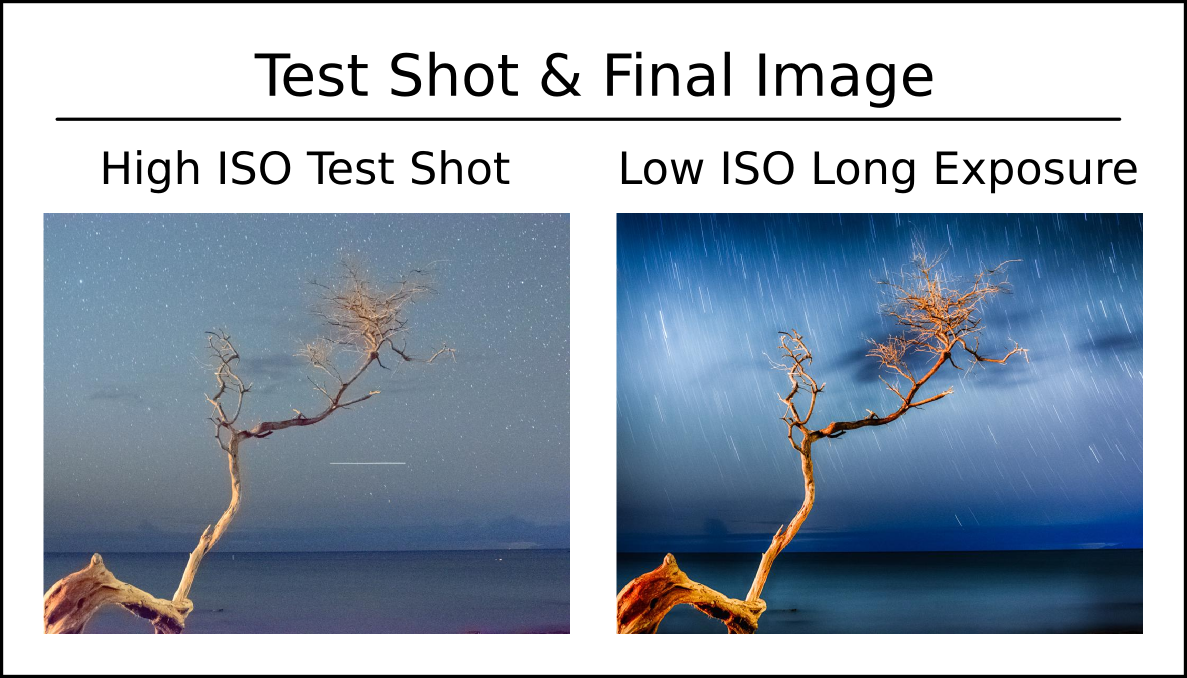
You may have noticed in the example I went from 8 to 15 and been a bit confused since 15 isn't 8 x 2. That's because there isn't a camera on the planet that will let you dial in a 16 second exposure. And to keep going, you won't get a 32 second, 1:04, 2:08, or 4:16 exposure either. And, nor would you want that level of granularity either. It jumps in thirds of a stop and it's simply much more reasonable to go from 8 seconds to 15 and 30 seconds. Similarly, if you started at 30 seconds and wanted to go down two stops, you wouldn't want to end on 7.5 seconds. That sort of minutia is better dealt with in post.
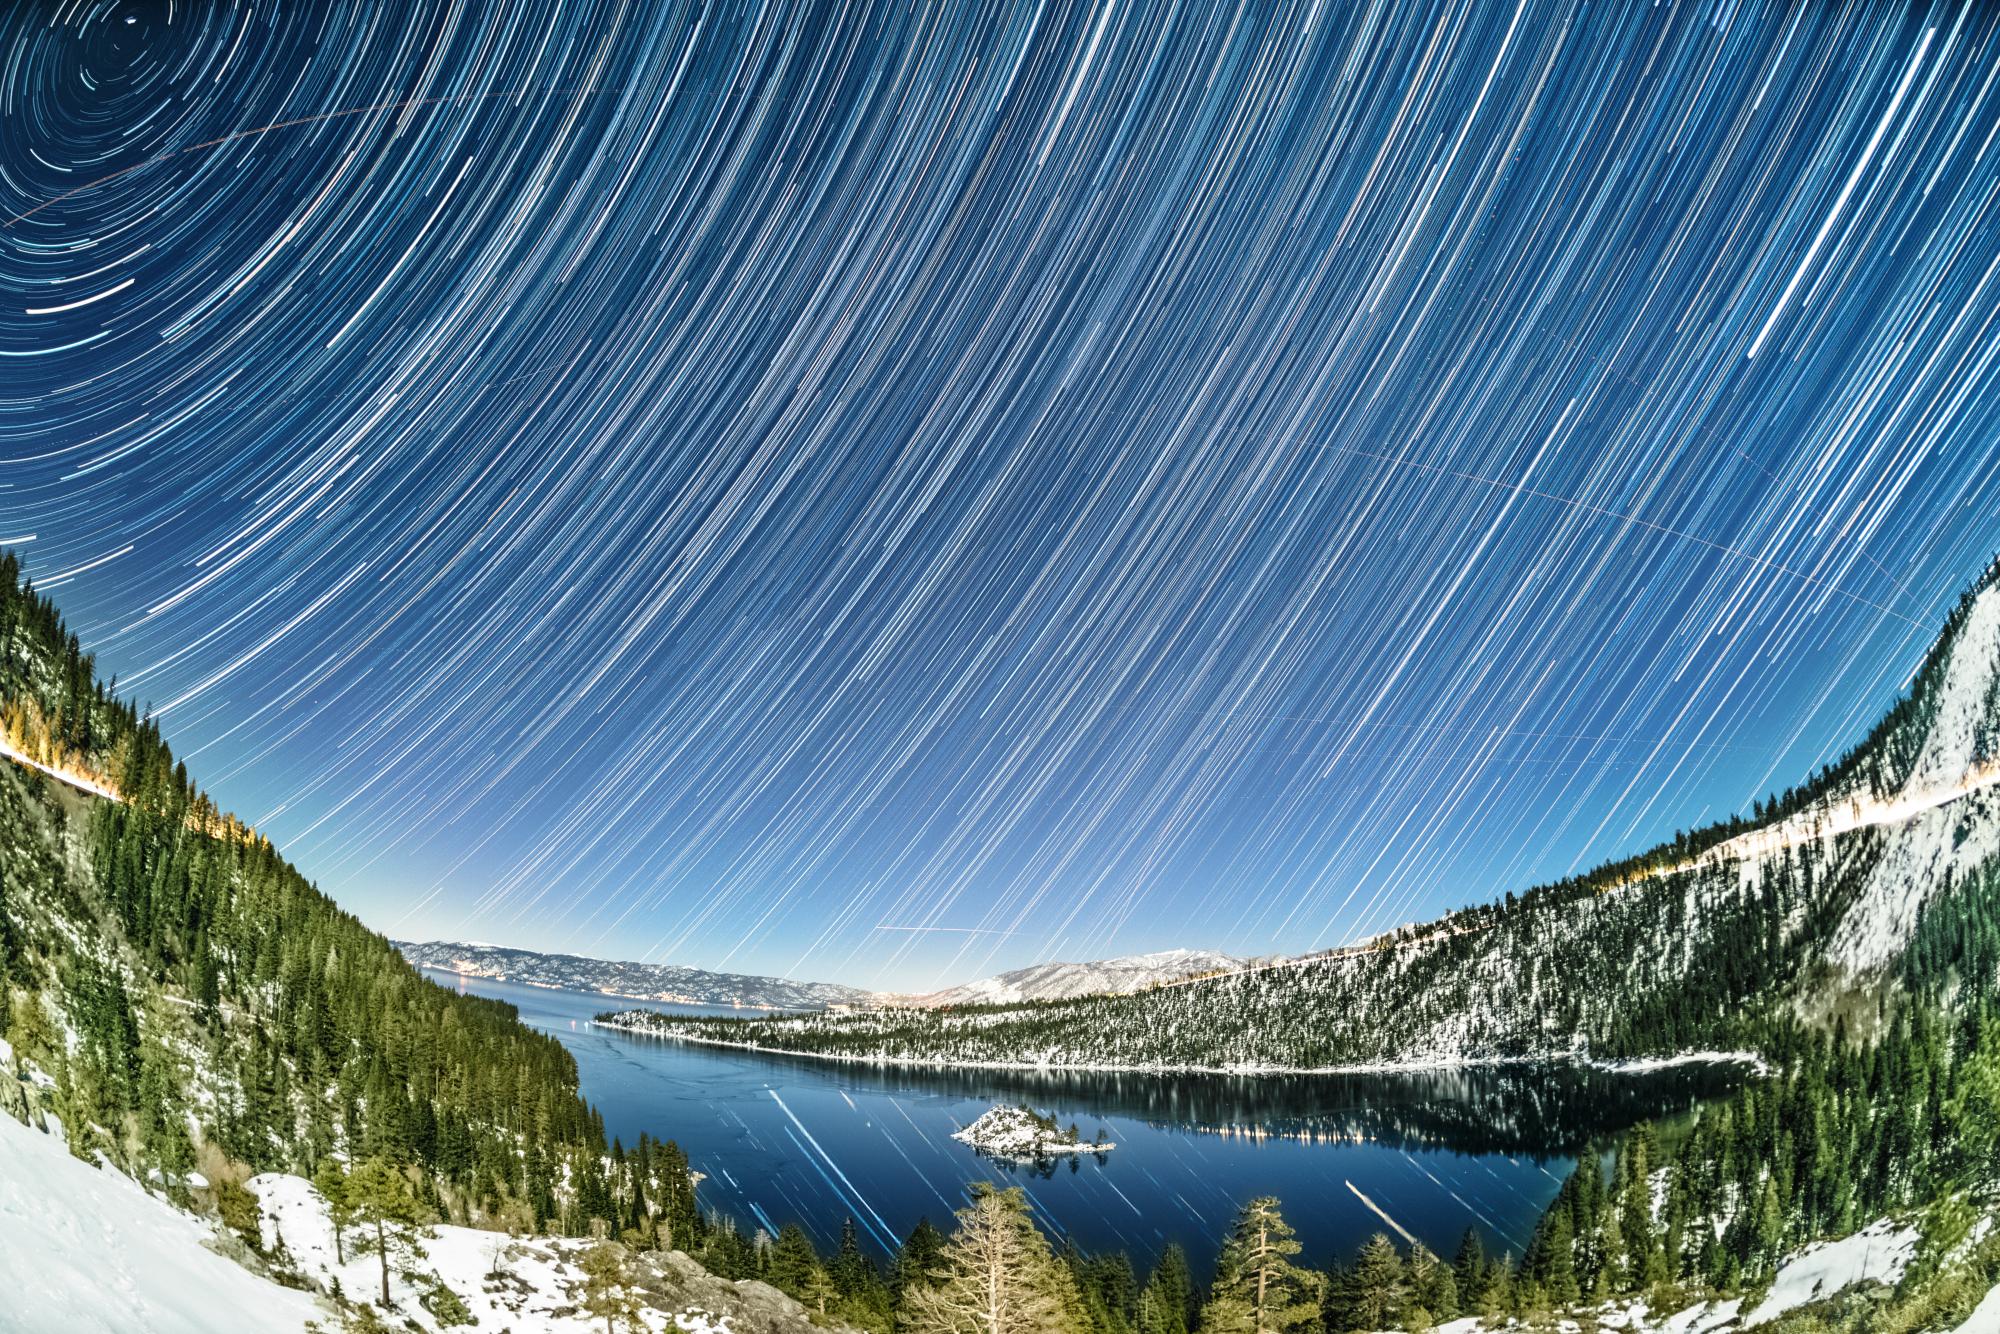
Star trails are just a special case of nighttime long exposure, but often require more forethought and experimentation. If you look up into the night sky, the stars appear to be static in place, but if you were to look again at the night sky several hours later, you would notice that all of the stars have moved. This is caused by the rotation of the Earth. If you could set up a several hour long exposure, you could capture the stars sweeping through the sky in a single image. Alas, this is not possible, but what you can do is shoot a several hour long sequence of 30 second exposures, then stack them together using StarStaX, a free program designed specifically for stacking star trails images.
Start just like any other nighttime long exposure, but for your composition (assuming you're in the northern hemisphere), pay special attention to the location of Polaris (the North Star), since that's where the stars are going to spin about. Use the same high ISO test shot procedure to establish your image. Then, walk your ISO down to where your shutter speed is 30 seconds. Take one low ISO test shot just to make sure everythig is good. Now, for sanity's sake, delete all of your test shots. Set your camera into Bulb mode. Set your intervalometer for 30 seconds with 1 second (or 0 if it'll let you) between exposures for an infinite number of shots. Cover your eye piece to prevent any stray light from getting in. Take a deep breath, and start your intervalometer. Now comes the most important part. Sit down, relax for a few hours, and watch the stars go 'round.
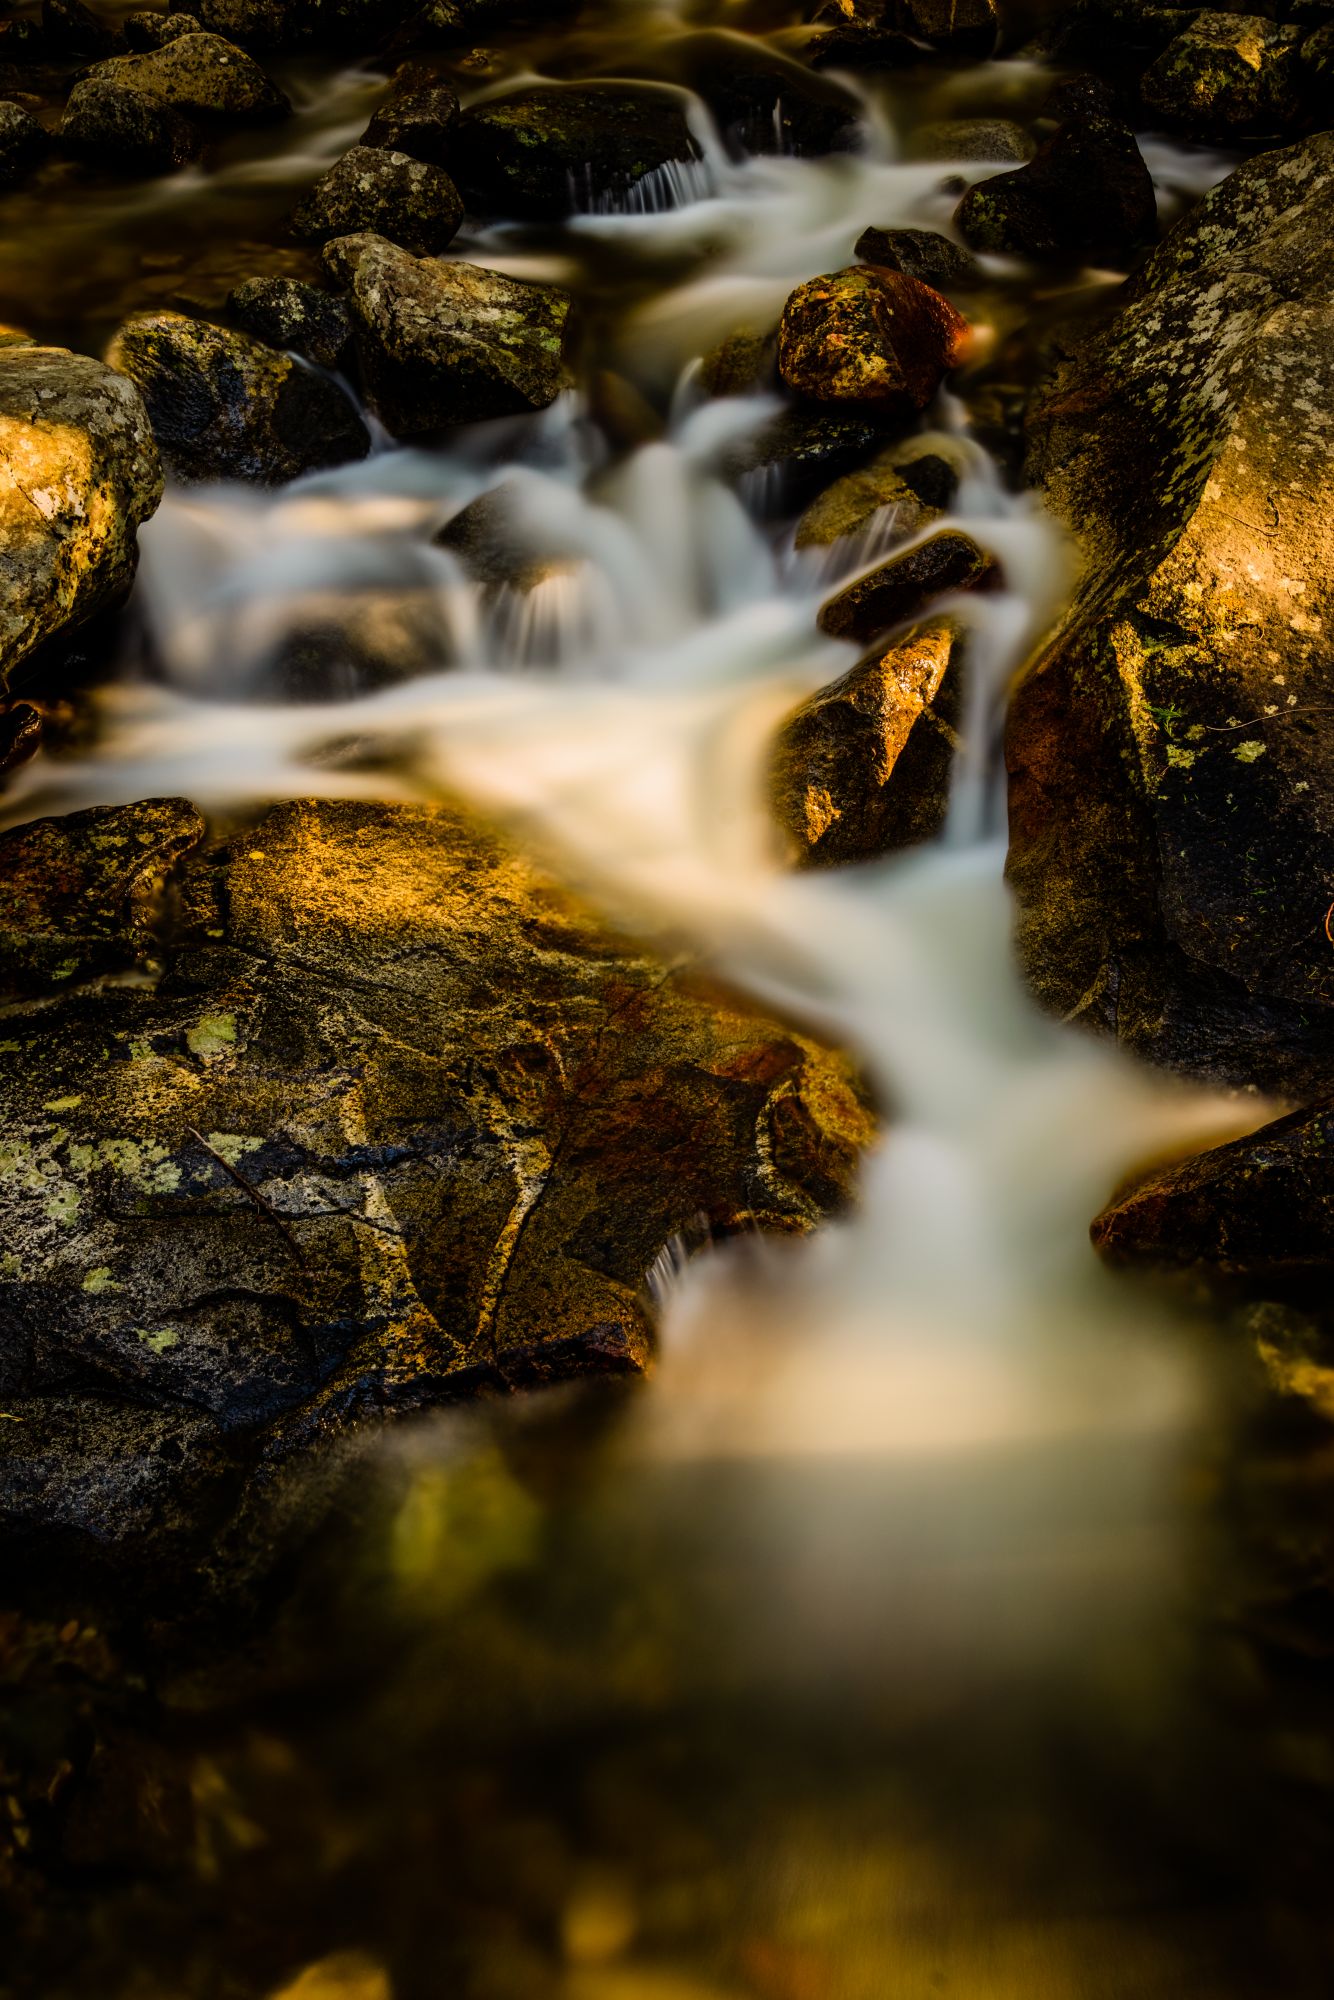
It may seem odd that daytime long exposure would come after nighttime long exposure, but nighttime long exposure can be accomplished with nothing more than a camera, tripod, and a lot of patience. Daytime long exposures require all of that and Neutral Density (ND) filter(s). Depending on the lens you're using ND filters can be cost prohibitive. The filter assembly and a complete set of ND filters for Nikon's 14-24mm lens can easily approach ~1000USD. In case you hadn't noticed, photography is an expensive hobby. That being said, my go to filter is a B+W 10 stop ND filter, which can be picked up for less than 100USD. Sometimes it's a little thicker than I want it to be, though that's usually only because I don't always want to pull out my remote shutter release and wait 4 minutes for an exposure. Sometimes it's a little thinner than I want it to be. Until recently, this could only be solved by stacking ND filters, which typically resulted in garish vignetting. Now, Formatt-Hitech has released a 16 stop ND filter, which makes 5 minute long daytime long exposures fun and easy.
Once you've made the financial leap and picked up a set of filters, there are a few things that you need to know before you go out shooting with them. First and foremost is, if you're using a 10 stop filter, you can't see anything through the viewfinder. Nothing. That means you have a choice. You can either remove the filter between each shot to compose and focus, or you you can try to use the rear LCD. I've found that if you have a fast lens (f/2.8 or faster), you can open it wide open and dial up a high ISO to get a reasonable preview in live view. The trouble there is, between each shot, instead of popping the filter on and off, you're adjusting aperture and ISO, either or both of which can be forgotten about when you trigger the next four minute long exposure. And believe me, there's not a whole lot more frustrating than waiting several minutes for a completely blown out exposure because you forgot for the 10th time that day to set your aperture back down. Conversely, I have yet to forget to put the filter back on before actuating the shutter, so that's my preferred method of dealing with the problem of not being able to see through a 10 stop filter.
High ISO test shots can (and should) also be used with daytime long exposure to establish proper exposure. Then, simply walk the ISO down to your desired level and double the exposure time for each stop.
Note: this section only applies to cameras with an optical viewfinder.
Some cameras have an infrared filter built into the sensor. Others do not. If your camera has an optical viewfinder and doesn't have an IR filter, this section is for you.
One might be tempted to think that while taking a picture, no light would come in through the viewfinder and ruin the image. One would also be wrong. If there is a strong light source behind your camera while tking a long exposure (like the sun), then you're exposure will have infrared light leak into it.
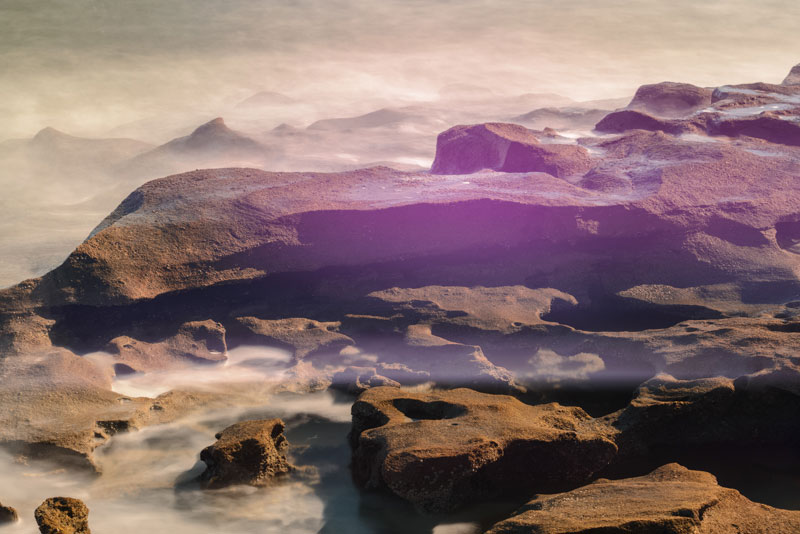
This effect is garish and uncorrectable in post. And, it's so easy to prevent, so don't let it happen! Just cover your viewfinder. Some cameras have a built in cover. Others came with one, but it probably got discareded since most people don't know what the little plastic piece is for. But, don't worry, you don't need anything fancy. Just cover it any way you can to keep light from coming in. That's all you have to do.
Modern Creativity
Get Comfortable Being Uncomfortable